

Avoid Leaks: Wetsuit Fit Guide and a 5 Minute Fit Check
- Fernando Antunes

- 1 day ago
- 10 min read
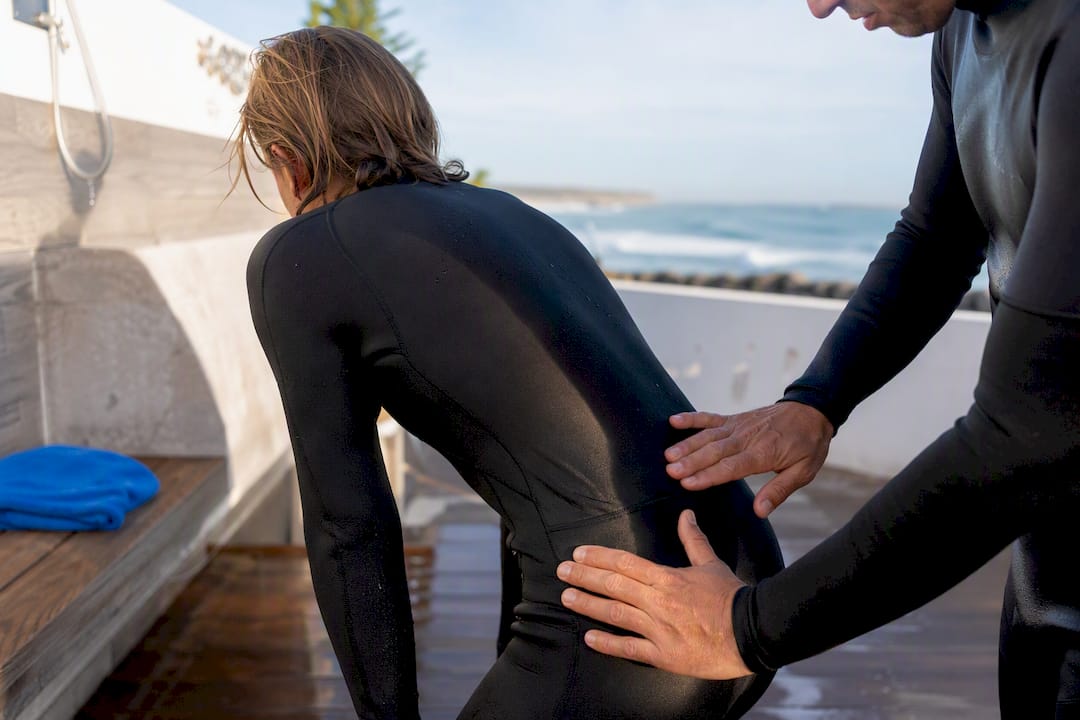
A properly fitted wetsuit should feel like a snug second skin, tight enough to trap a thin layer of water your body warms, with no pooling at the lower back or gaps at the neck. Chest and height are the two measurements that matter most, since they control the neck seal and torso length. Before you buy or rent anything, do this one check: bend forward at the waist. If neoprene bunches or pools above your lower back, the suit is wrong for you.
TL;DR:
The lower back and shoulder mobility are the most critical fit zones, with pooling or bunching indicating sizing issues that affect water sealing and comfort.
Measure height and chest precisely, including in the same underlayer used during actual surfing, and favor sizing down when between two sizes to prevent leaks.
Proper donning technique, especially seating the torso panel before the upper body, is essential to avoid false fit readings and damage to the suit.
Thicker neoprene requires a snug fit to ensure the core seal remains watertight, especially in cold water conditions where leaks cause rapid chill.
Regularly rinse, dry, and store the wetsuit correctly to maintain its shape and fit, preventing compression, seam puckering, or loss of elasticity over time.
Table of Contents
What Should a Wetsuit Fit Feel Like, Zone by Zone?
Fit isn’t one measurement, it’s six checkpoints, and each one fails or passes for a different mechanical reason. A suit that nails the chest but ignores the ankles will still flood on every duck dive.
Sigma Sports describes the ideal fit as a firm handshake, snug everywhere without loose pockets or pressure points that leave marks. Here’s what that looks like zone by zone:
Neck: Should sit flush against your skin with no more than one or two fingers of slack. Gap here means cold water floods in with every wave, and it usually shows up first when you lean your head forward.
Lower back: The single best fit indicator in the entire suit. Bend forward and look for pooling or bunching. Wetsuit Centre notes that pooling here means the torso is too long and will flush cold water on paddling and duck dives.
Shoulders and underarms: You should be able to rotate your arms in a full paddling circle without the seams biting or fabric riding up into your armpit. Underarm bunching signals a suit cut too narrow through the chest.
Knees: Panels should sit at the kneecap, not several inches above or below. Too high restricts kneeling in a duck dive; too low bunches and wears through faster.
Wrists and ankles: Cuffs should seal without a visible gap, but shouldn’t dig in hard enough to cut circulation on a two-hour session.
Crotch: No excess fabric bunching when you stand, and no upward pull that rides the panel too high when you squat.
Two zones do most of the diagnostic work: lower back and shoulder mobility. If those two pass, the suit is very likely right. Rip Curl’s fit guide lists common red flags worth memorizing: neck gaps on forward lean, bunching behind the knees, sleeves that hang past your wrist, and shoulders that fight you when you paddle. Any one of those on its own might be tolerable. Two or more together mean try a different size.
How Do You Measure Yourself For A Wetsuit Size Chart?
Every wetsuit size chart runs off the same core numbers, and getting them right the first time saves you a return shipment or a wasted rental fitting. Measure in light clothing, standing naturally, and write the numbers down before you shop.
Height. Stand against a wall, no shoes, and mark the top of your head. Height determines torso length more than any other single number.
Chest. Wrap the tape around the fullest part of your chest, under your arms, keeping the tape level front to back.
Waist. Measure at your natural waistline, roughly level with your belly button, not where your pants sit.
Weight. Use this as a cross-check against chest and height, not as your primary number.
Hips (for women’s suits). Measure at the widest point, usually across the hip bones.
Chest and height do the heavy lifting because they set the neck seal and the torso length, the two zones most likely to leak. Weight and waist refine the choice between two close sizes rather than driving the decision outright. Rip Curl’s guidance is blunt on this: prioritize chest and height over waist and weight, and when your numbers land between two sizes, size down, since neoprene relaxes slightly once it’s wet.
Most brands also publish short (S) and tall (T) variants for a reason. If your chest measurement fits a Medium but you’re several inches taller or shorter than the chart’s average height for that size, the standard cut will pool or overstretch at the lower back before it ever fails at the chest. Reach for the tall or short variant before you jump a full size.
Pro Tip: Measure in the same underlayer you’ll actually wear surfing, like a rash guard or swim shorts, since a bulky base layer can throw off your chest number by half an inch or more.
How Do You Put A Wetsuit On Correctly?
A huge share of “bad fit” complaints are actually donning errors, not sizing errors. Neoprene that’s bunched wrong at the crotch reads as a small suit even when the size is perfect.
Turn the legs partially inside out and step in one leg at a time.
Work the material up gradually from your ankles to your knees to your thighs, smoothing as you go rather than yanking the waistband up in one pull.
Pull firmly from the crotch and inner thighs to seat the torso panel correctly before you touch the upper body at all.
Smooth the torso section up over your stomach and chest, working out any trapped air pockets as you go.
Insert one arm at a time, then work the shoulder seams into place.
Zip up completely and do a final smoothing pass at the lower back and underarms.
Skipping step three is the most common mistake, and it’s why a suit can feel loose at the chest and tight at the knees at the same time. Long fingernails and jewelry are the other usual suspects. Both snag neoprene and can tear a panel that would otherwise last years. Wavemaster’s fitting notes back this up directly: donning technique that pulls material up from the inner thighs before checking overall fit prevents most of what looks like a sizing problem. Take it slow. Rushing the first two minutes costs you nothing but leads to false fit readings and, occasionally, a ripped seam on a suit you haven’t even paddled out in yet.
What If You’re Between Two Wetsuit Sizes?
When your measurements straddle two sizes, chest and height break the tie every time. Don’t let a slightly loose waist or a few extra pounds talk you into sizing up. That decision almost always costs you a leaky neck seal, which matters far more than a little slack around your midsection.
Accept a small amount of cuff looseness at the wrist or ankle before you accept any gap at the neck.
Try the short or tall variant of your chest size before jumping to a completely different size number.
For surfing, lean snug. A little resistance in the changing room disappears once the neoprene meets water.
For diving, get the core torso fit right first; cuff and ankle comfort matter less once you’re weighted and horizontal.
For triathlon or open-water swimming, go tighter than you would for surfing. A hydrodynamic fit reduces drag, and you’re moving constantly, so you generate your own warmth.
Surfing, diving, and swimming all reward a snug core, but they disagree on how much you should compromise elsewhere. Know which one you’re buying for before you split the difference.
What Fit Tests Should You Run In The Changing Room?
Standing still in a mirror doesn’t tell you whether a suit will hold up when you’re paddling into a set or ducking under a wave. Three quick dynamic tests do a much better job.
Squat test: Drop into a full squat and hold it for ten seconds. You should feel resistance but not pain, and the crotch panel shouldn’t ride up uncomfortably.
Overhead reach: Raise both arms straight overhead like you’re reaching for a rail. If the hem pulls sharply out of your lower back or your shoulders feel locked, size up or try a different cut.
Breathing check: Take a few deep breaths with the suit fully zipped. Tightness across the ribs that limits a full breath is a fail, not something you’ll adjust to.
Lower-back visual check: Bend forward one more time after the squat and reach tests. This is your final confirmation, and Wetsuit Centre calls it the fastest, most reliable changing-room indicator of real in-water performance.
Rip Curl recommends the squat and overhead reach specifically because failing either one usually predicts restricted paddling or a duck dive that floods. Signs you’ve gone too big: obvious pooling, a zipper that closes with zero resistance, and visible gaps at the cuffs. Signs you’ve gone too small: shoulders that won’t rotate, a glossy sheen where the neoprene is stretched thin, and any pain, not just tightness, across the chest or ribs.
Pro Tip: A brand new suit always feels tighter on land than it will in the water. The neoprene softens and relaxes slightly after your first couple of sessions, so don’t size up just because day one felt stiff.
How Does Wetsuit Thickness Change What “Good Fit” Means?
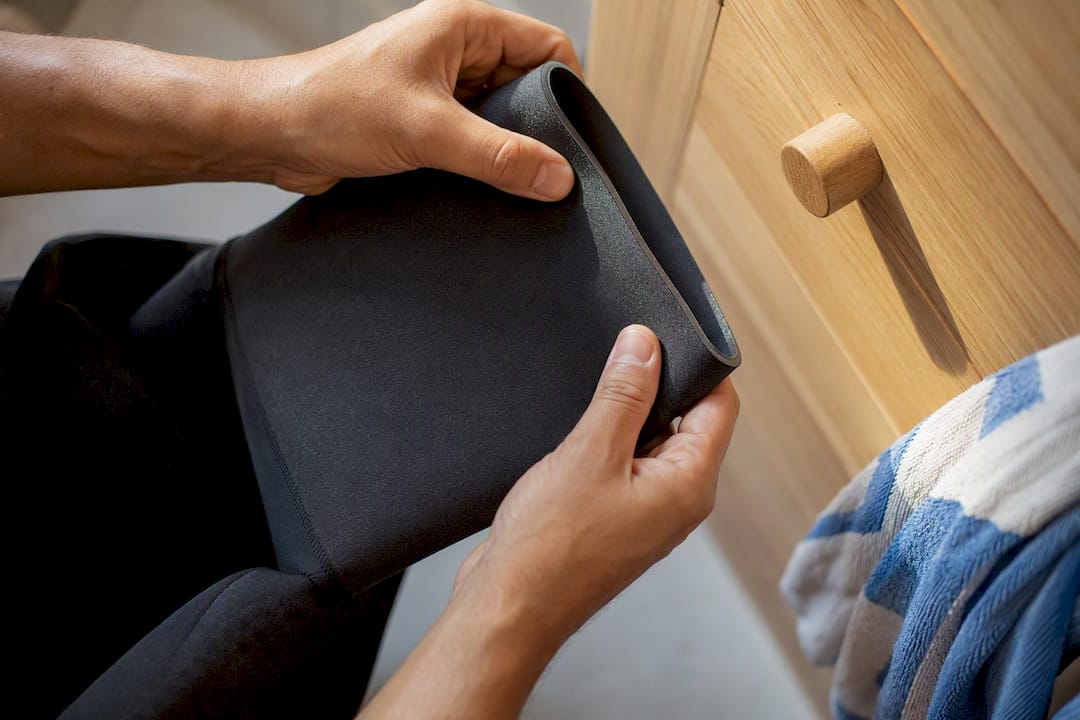
Thicker neoprene, think 4/3mm or 5/4/3mm builds for cold water, feels noticeably firmer and stiffer than a 2mm summer suit, even at the exact same size. That stiffness is not a fit problem, it’s the material doing its job.
For cold water, prioritize a snug seal at the neck, wrists, and ankles over chasing extra shoulder mobility. Rip Curl’s fit guidance is clear that a snug core seal matters more than sizing up for comfort, because extra flush from a loose thick suit defeats the entire point of the insulation. A cold-water suit that leaks water through a gapping neck will chill you faster than a thinner suit that seals properly.
Activity still shifts the calculation:
Surfing rewards a snug core with enough shoulder freedom for a full paddle stroke.
Triathlon and open-water swimming reward going tighter still, since a smooth surface reduces drag and you’re generating heat constantly through motion.
Diving asks you to balance a snug core against cuff comfort, since you’ll be wearing the suit for hours, often with less continuous movement than a surfer paddling.
The instinct to size up when a suit feels restrictive is usually the wrong move. A better fix is often a different cut or a different thickness rated for the conditions, not a bigger size that reintroduces flush at the neck and lower back.
How Do You Clean And Store A Wetsuit To Protect Its Fit?
Neoprene loses its shape gradually, through UV exposure, poor drying, and rough handling more than through ordinary wear. The habits below protect both hygiene and the fit you worked to dial in.
Rinse the suit inside and out with fresh water immediately after every session, saltwater and chlorine both accelerate neoprene breakdown.
Use a wetsuit-specific cleaner or shampoo rather than household detergent, which strips the flexible coating and speeds up cracking.
Turn the suit inside out to dry, since the interior traps more moisture and odor-causing bacteria than the outer shell.
Dry in the shade on a wide, wetsuit-specific hanger. Direct sun degrades neoprene and narrow wire hangers stretch and deform the shoulders over weeks of storage.
Store flat or on the wide hanger in a cool, dry space, never folded tightly for long periods, which creates permanent crease lines.
Rental operations live and die by this routine. EquipDash’s care guidance for rental gear recommends cleaning after every single use with a wetsuit-specific cleaner and drying inside-out in the shade specifically to prevent bacteria buildup and UV damage between renters. That same discipline extends the useful life of a personal suit by a meaningful margin, since proper care preserves the neoprene’s memory rather than letting it compress and go slack at the knees and seat.
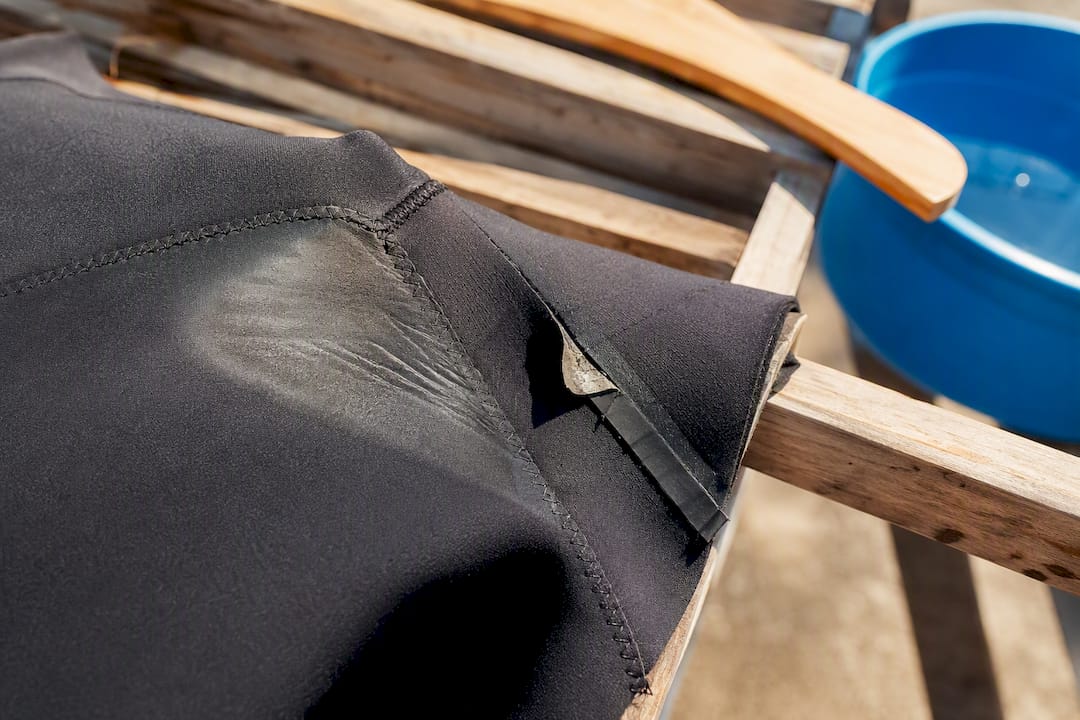
Watch for two failure signs that change fit over time: neoprene that’s gone permanently thin and glossy at stress points (compression that never bounces back), and seam tape that’s peeling or stitching that’s pulling loose. Either one means retirement is closer than another patch job. A suit that’s lost its compression can look fine on the hanger and still fail the lower-back check the moment you bend forward. If you’re deciding on gear beyond the suit itself, a broader surf equipment guide for beginners covers the rest of what belongs in your kit bag.
An Instructor’s View On Fit From The Beach
Teaching beginners day after day, I watch the same two mistakes over and over: a student grabs whatever size sounds close to their normal clothing size, and they skip checking their lower back entirely. Those two habits cause most of the paddling struggles and cold complaints I see in a first lesson.
The lower back and shoulder checks aren’t just theory. They’re what separates a student who paddles comfortably from one who fights their own suit for an hour. When we help fit someone in person, whether for a lesson or a rental, we can spot a pooling lower back or a locked shoulder in seconds, adjust to a different size or cut, and get them in the water without that friction. That’s the advantage of a five-minute fitting check over guessing from a size chart alone. A rental suit that’s been cared for properly, rinsed, dried right, stored on a wide hanger, also holds its shape far better across a season, which means the fit you get on day one still holds by week three.
— Fernando
Need Help Getting The Fit Right In Person?
A size chart gets you close. A five-minute hands-on check gets you right, and that’s the gap Riparsurfschool fills for anyone learning near Praia Areia Branca. Instead of guessing your way through an online chart alone, you can get fitted by someone who checks your lower back and shoulder mobility before you ever paddle out.

Rental gear goes through the same rinse-and-dry routine covered above, so the suit you’re handed hasn’t been left to compress or degrade between renters. If you’re bringing your own underlayer to a fitting, a lightweight swim short makes it easier to judge chest and torso fit accurately. Whether you need a full beginner surf lesson with fitting included, one-on-one attention through a private surf lesson, or just want to rent a properly cared-for suit before your session, the fastest way to sort it out is to book online and get matched with the right size before you hit the water.
Sources
Recommended
Comments